06 如何用代码生成工具做开发?
06 如何用代码生成工具做开发?
前言
前面已经将权限模块的系统设计做好了,代码生成工具也按照之前指定的规范调整了。
接下来,要正式开始开发了。
首先,看看用代码生成工具是如何做开发的,后面其他模板的基础CRUD代码都是用这个代码生成工具一键生成的。
1 将代码生成工具导入idea
代码生成工具gitee地址:https://gitee.com/dvsusan/code-generator
将该项目导入到idea中: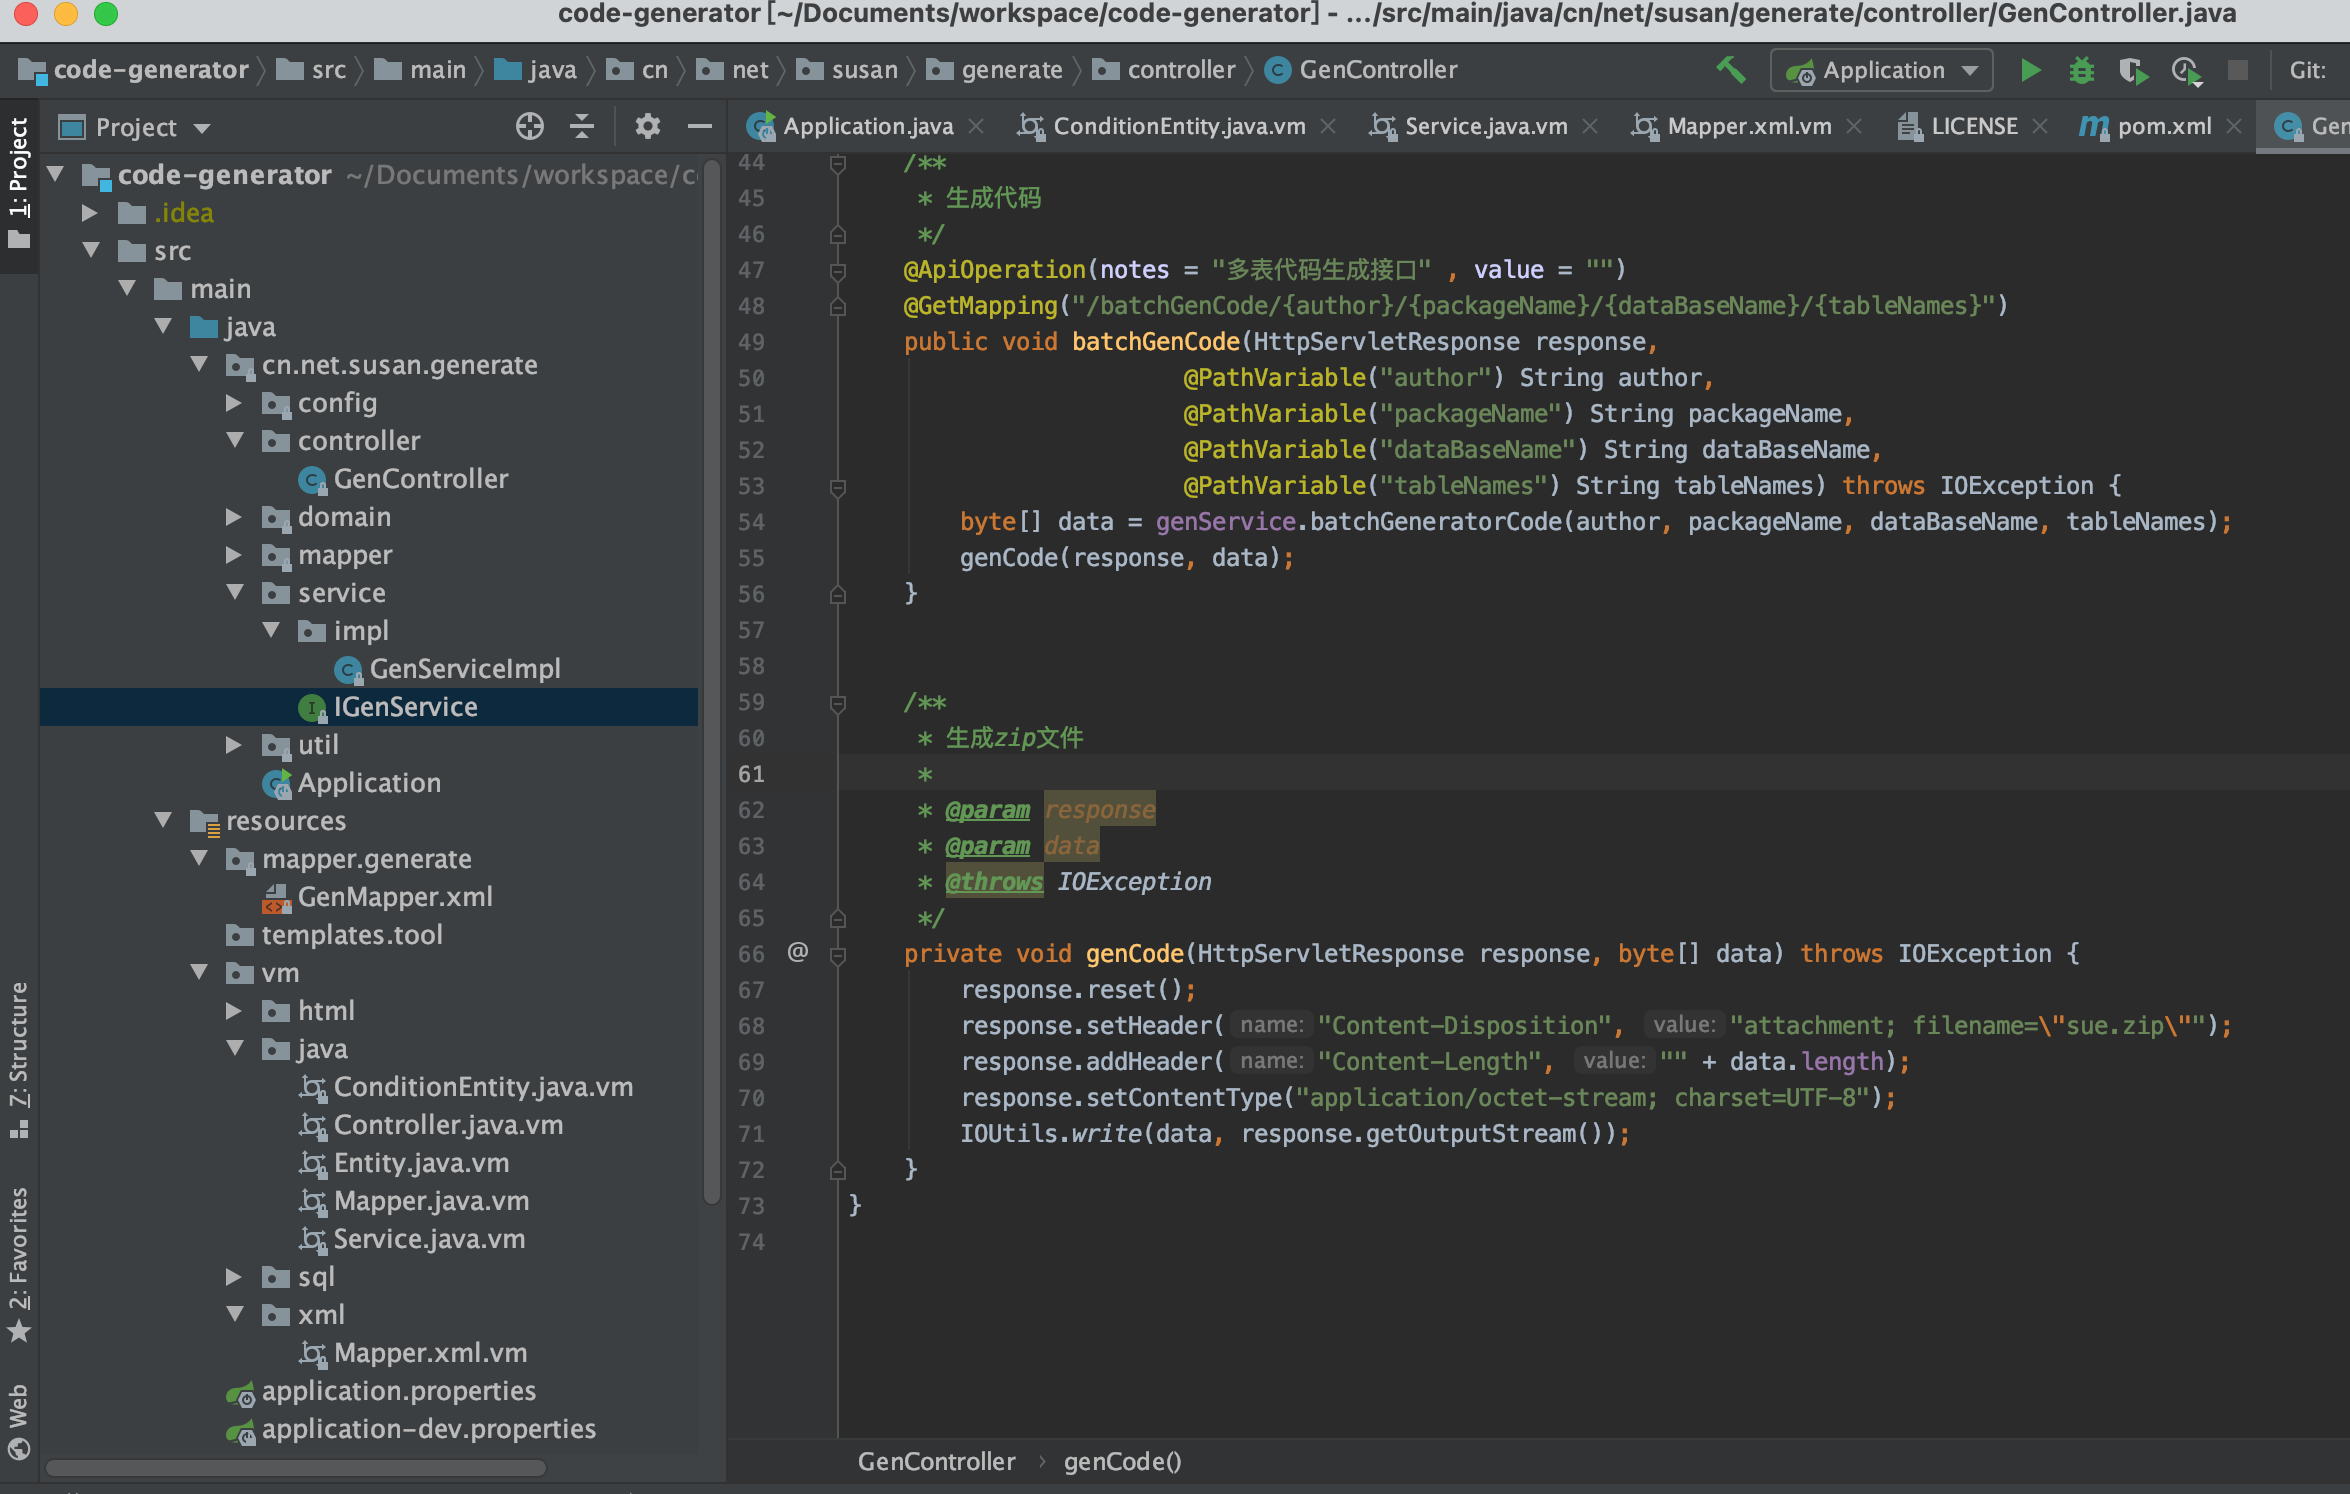
右键pom.xml文件,选择 Add as Maven Project会将该项目变成maven项目。
打开application-dev.properties文件: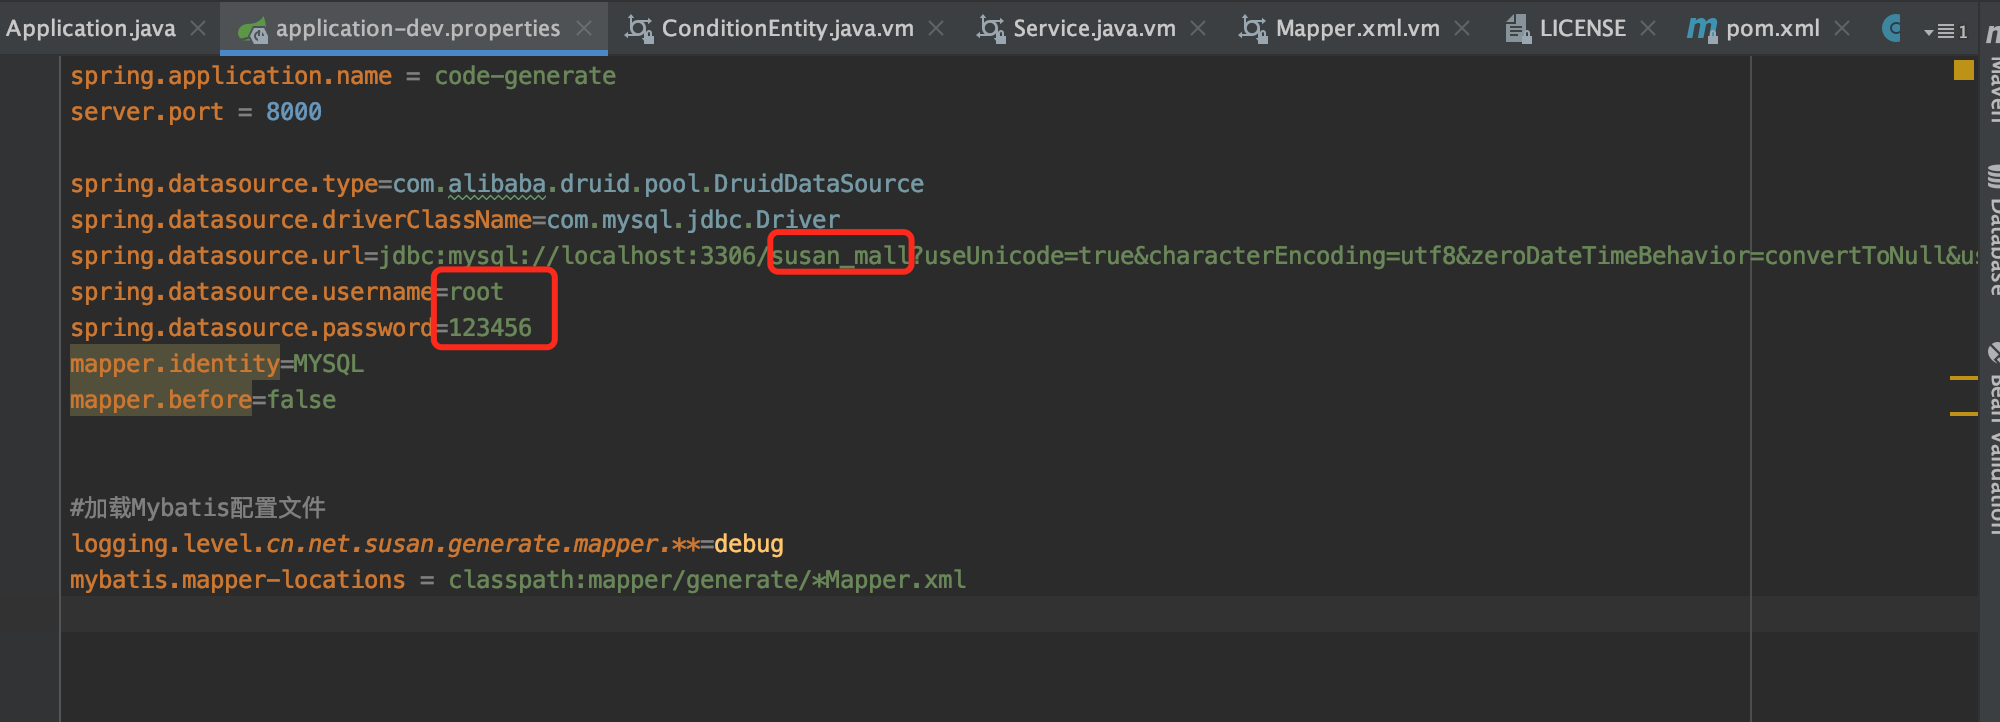
修改数据库配置,如果你跟我本地的数据库名称、账号、密码不一样的话,可以改成你本地的数据库配置。
2 运行代码生成工具
调整完之后,找到Application类,右键之后,会弹出如下窗口: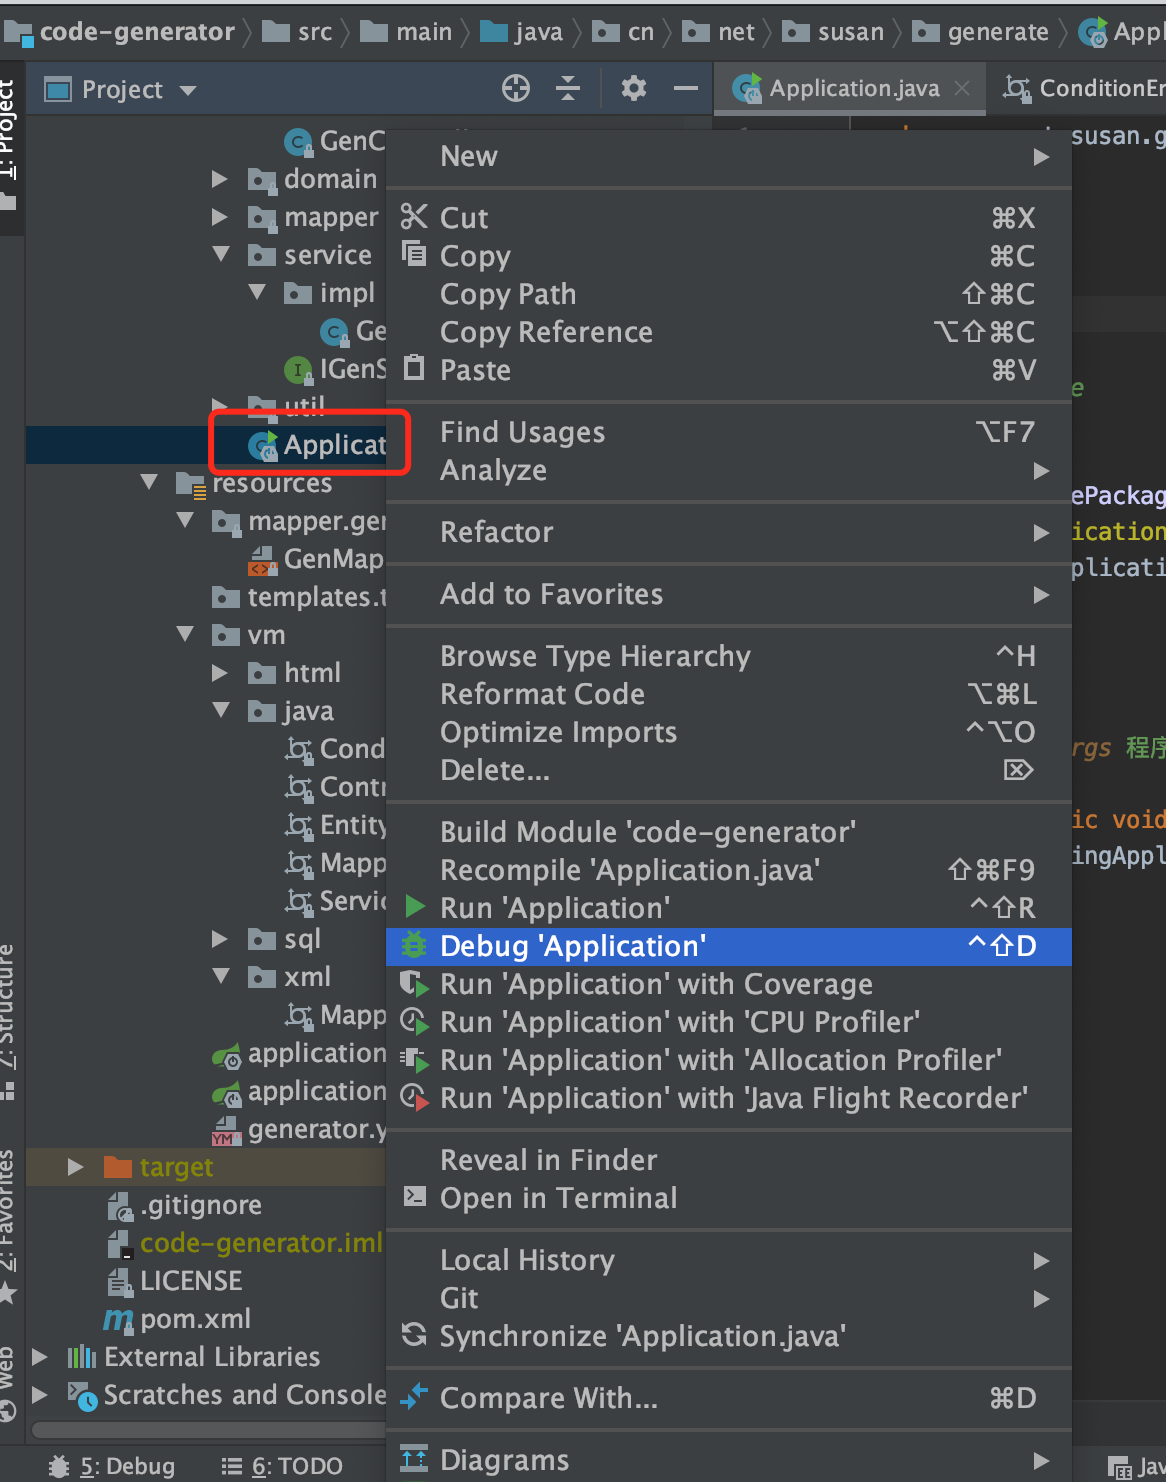
选择Run Application或者Debug Application。
项目启动之后,在idea的Console中没有看到异常日志,说明启动成功了。
此时,在浏览器的地址栏中输入url:http://localhost:8000/swagger-ui.html
需要特别注意的是端口号是:8000,不是用的默认的:8080。
会出现下面的界面: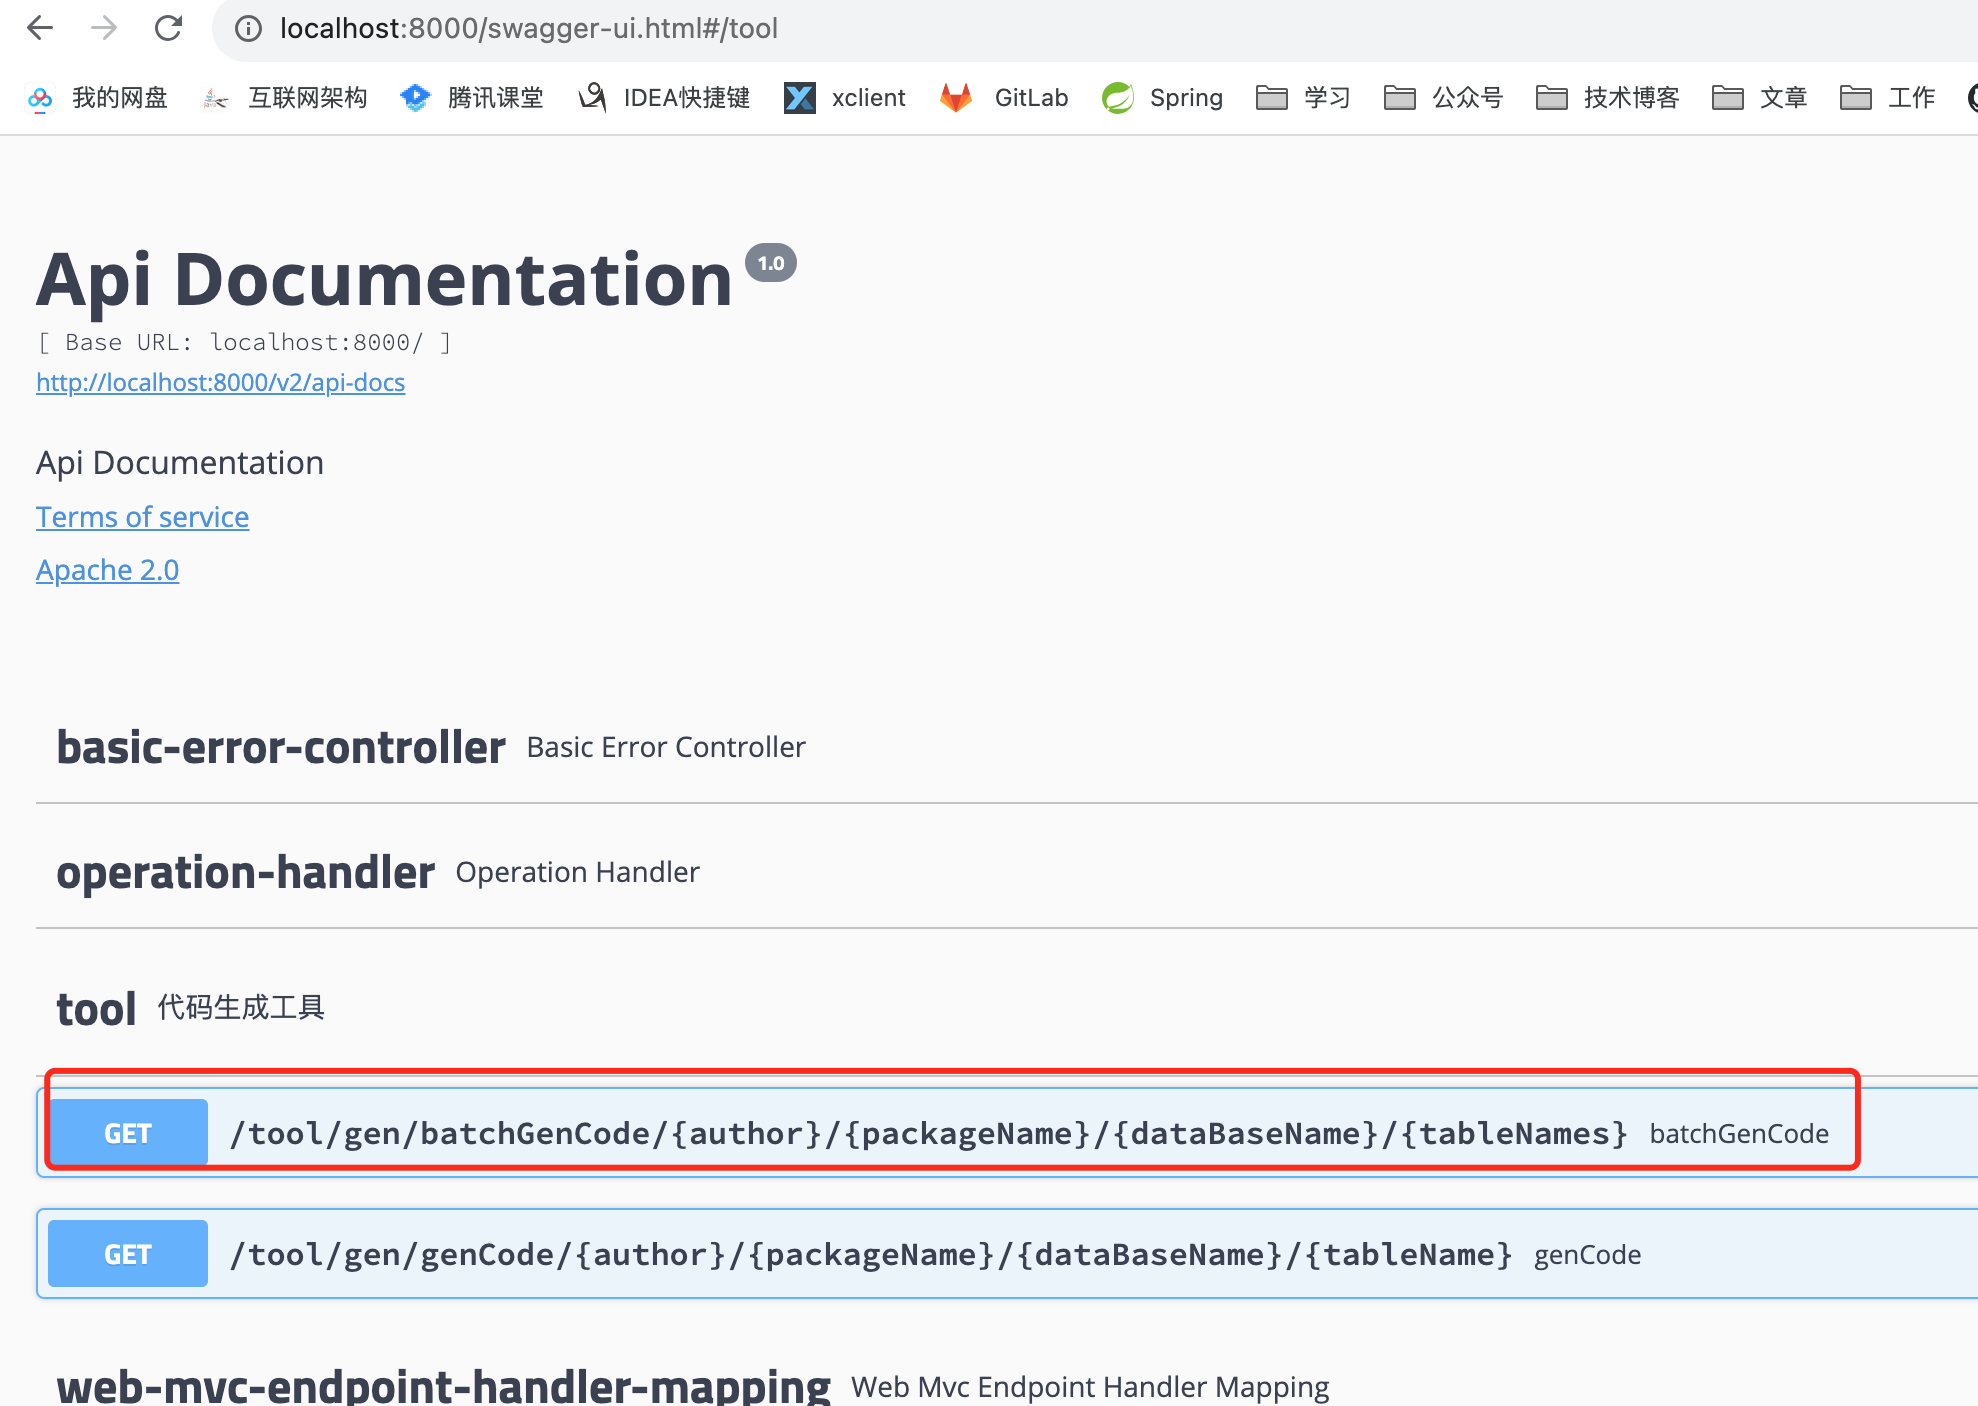
选择tool Controller下面的batchGenCode接口,该接口是一个批量接口。
由于我们之前设计的权限模块会涉及多张表,因此,需要批量生成多张表相关的基础CRUD代码。
在打开的form表单中输入如下信息: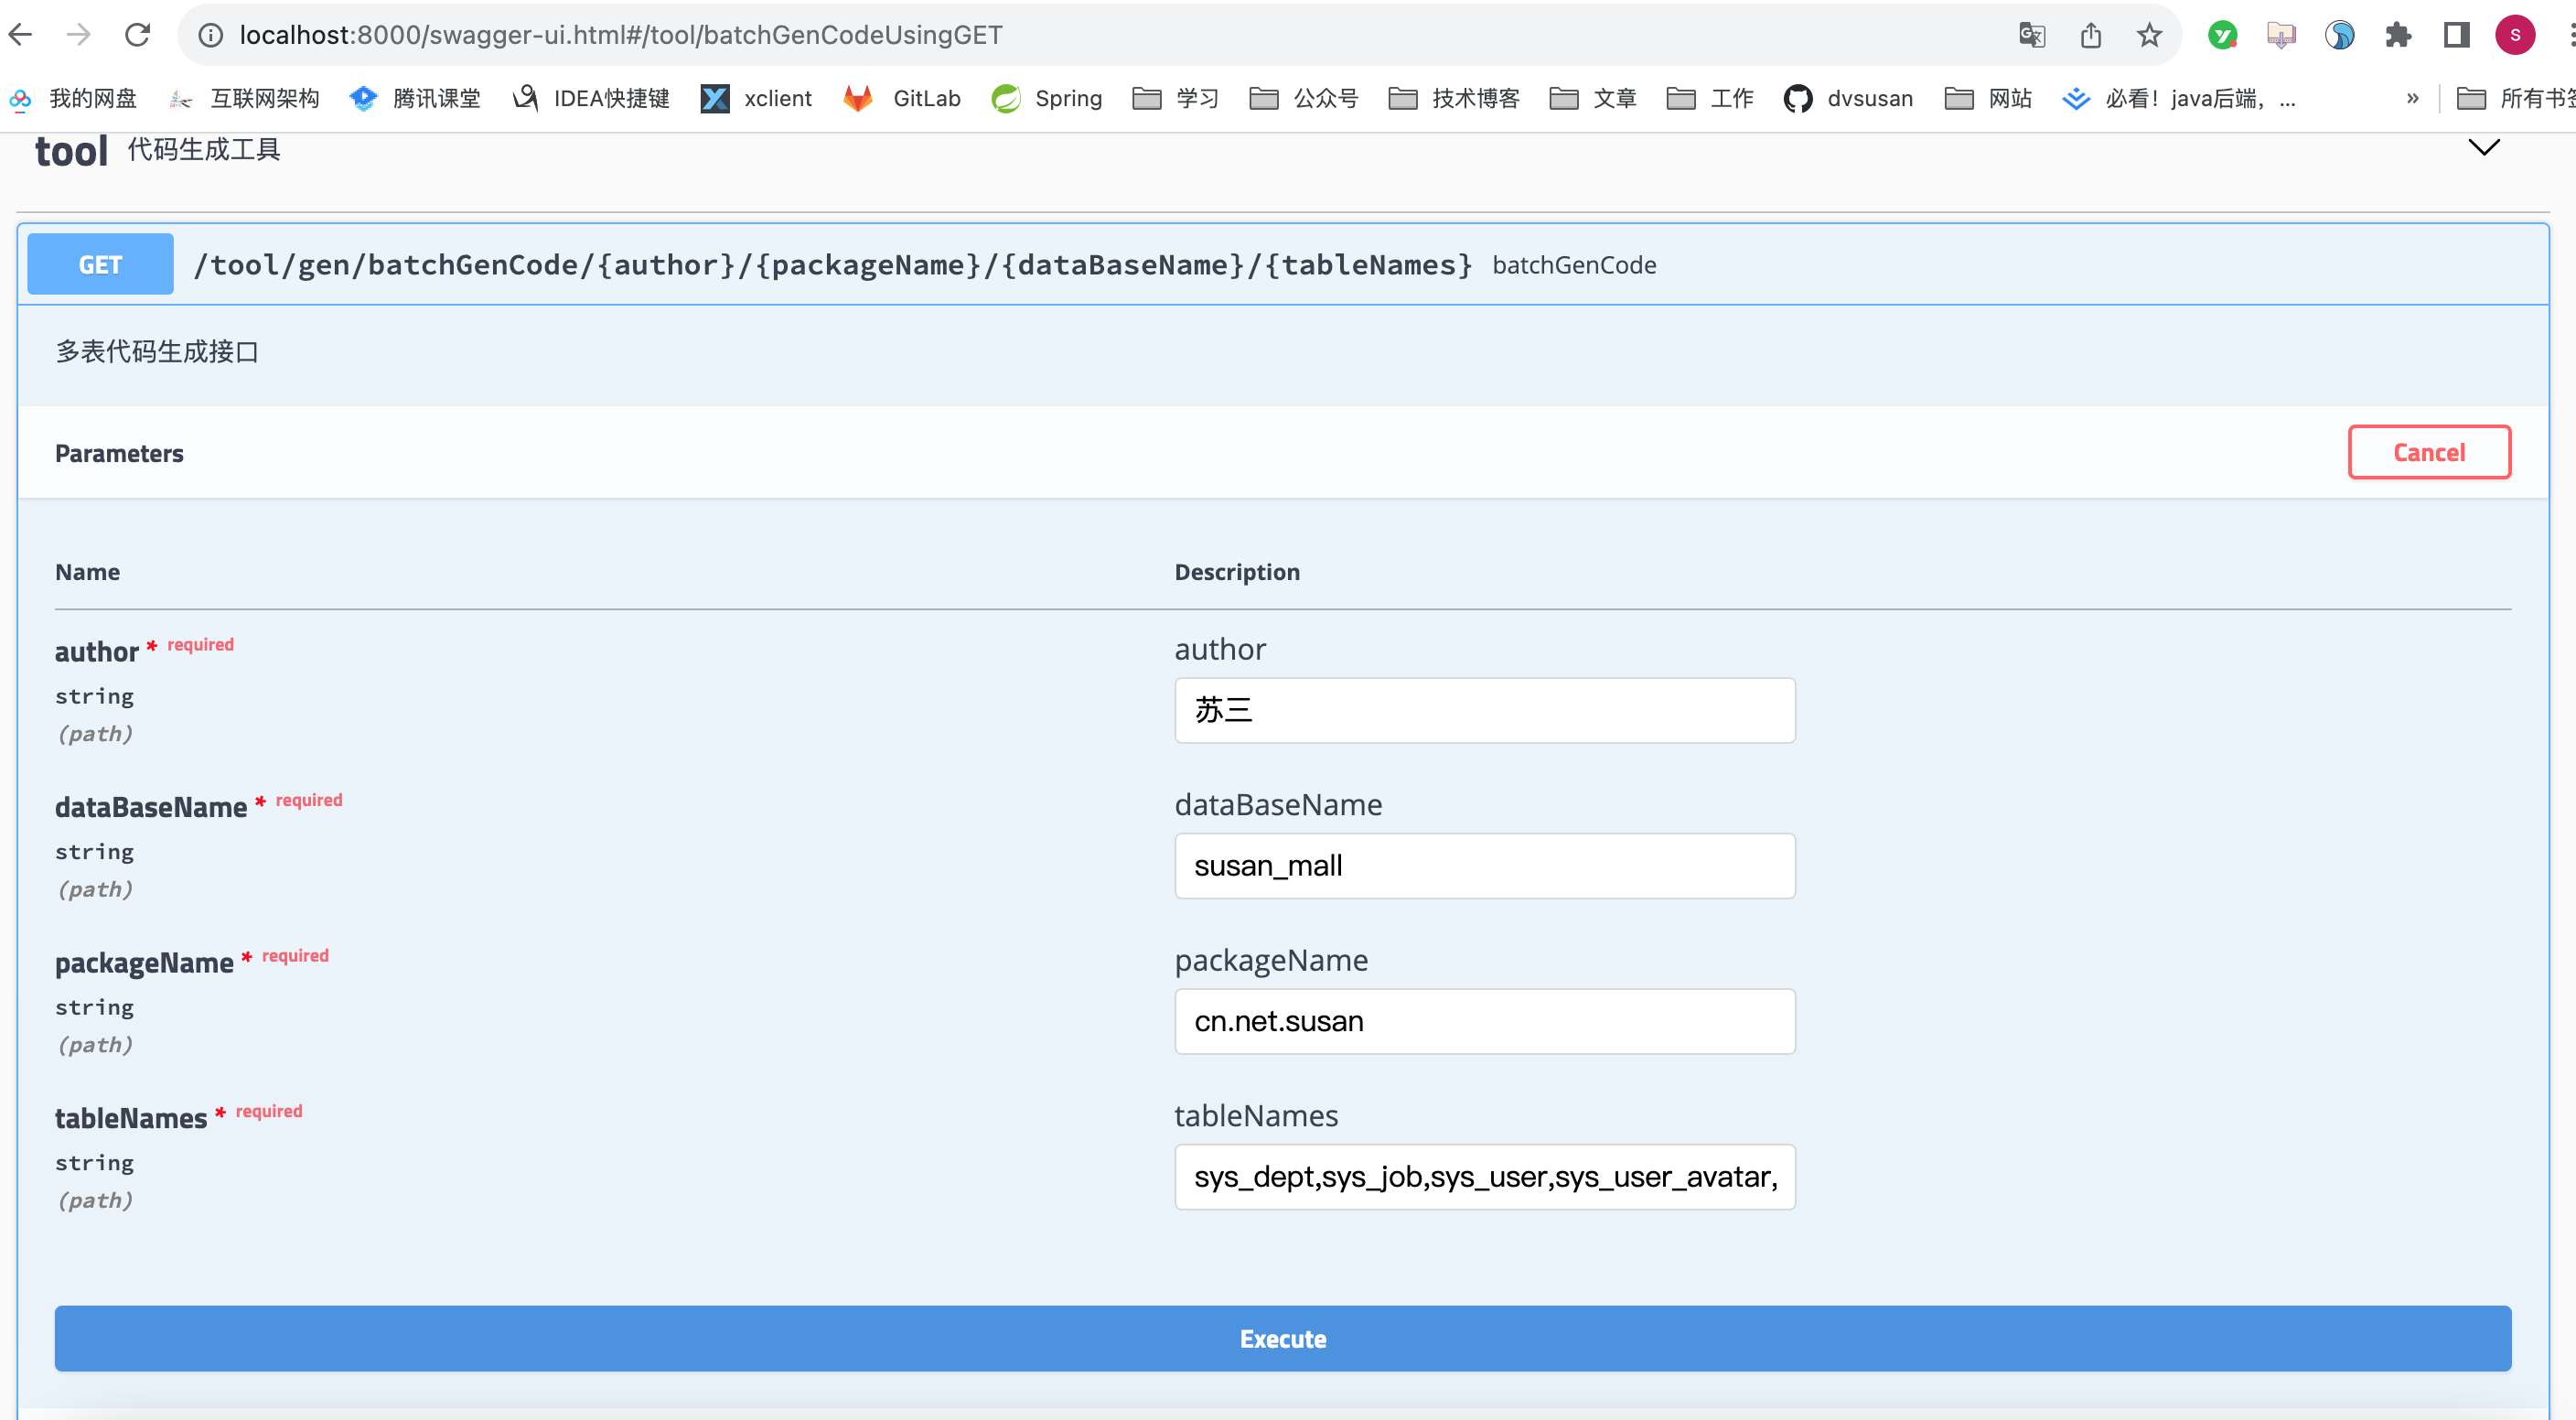
其中:
- author:表示作者
- dataBaseName:表示数据库名称
- packageName:表示包路径
- tableNames:表示表名称,如果有多张表,则用英文逗号分割。
注意权限模块的表,属于系统级别的表,表名都带有sys_前缀。但不想实体类中也以sys开头,看起来怪怪的。
有没有办法,让实体类上不包含sys呢?
答:修改generator.yml文件。
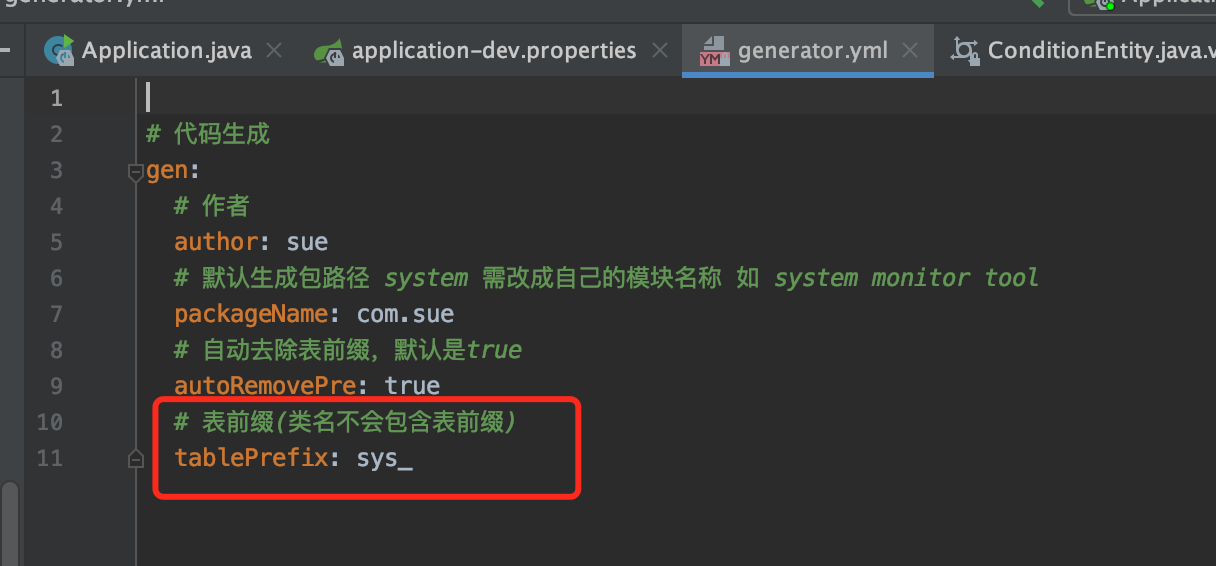
在tablePrefix参数中增加sys_即可。
前面的form表单填好之后,点击Execute按钮。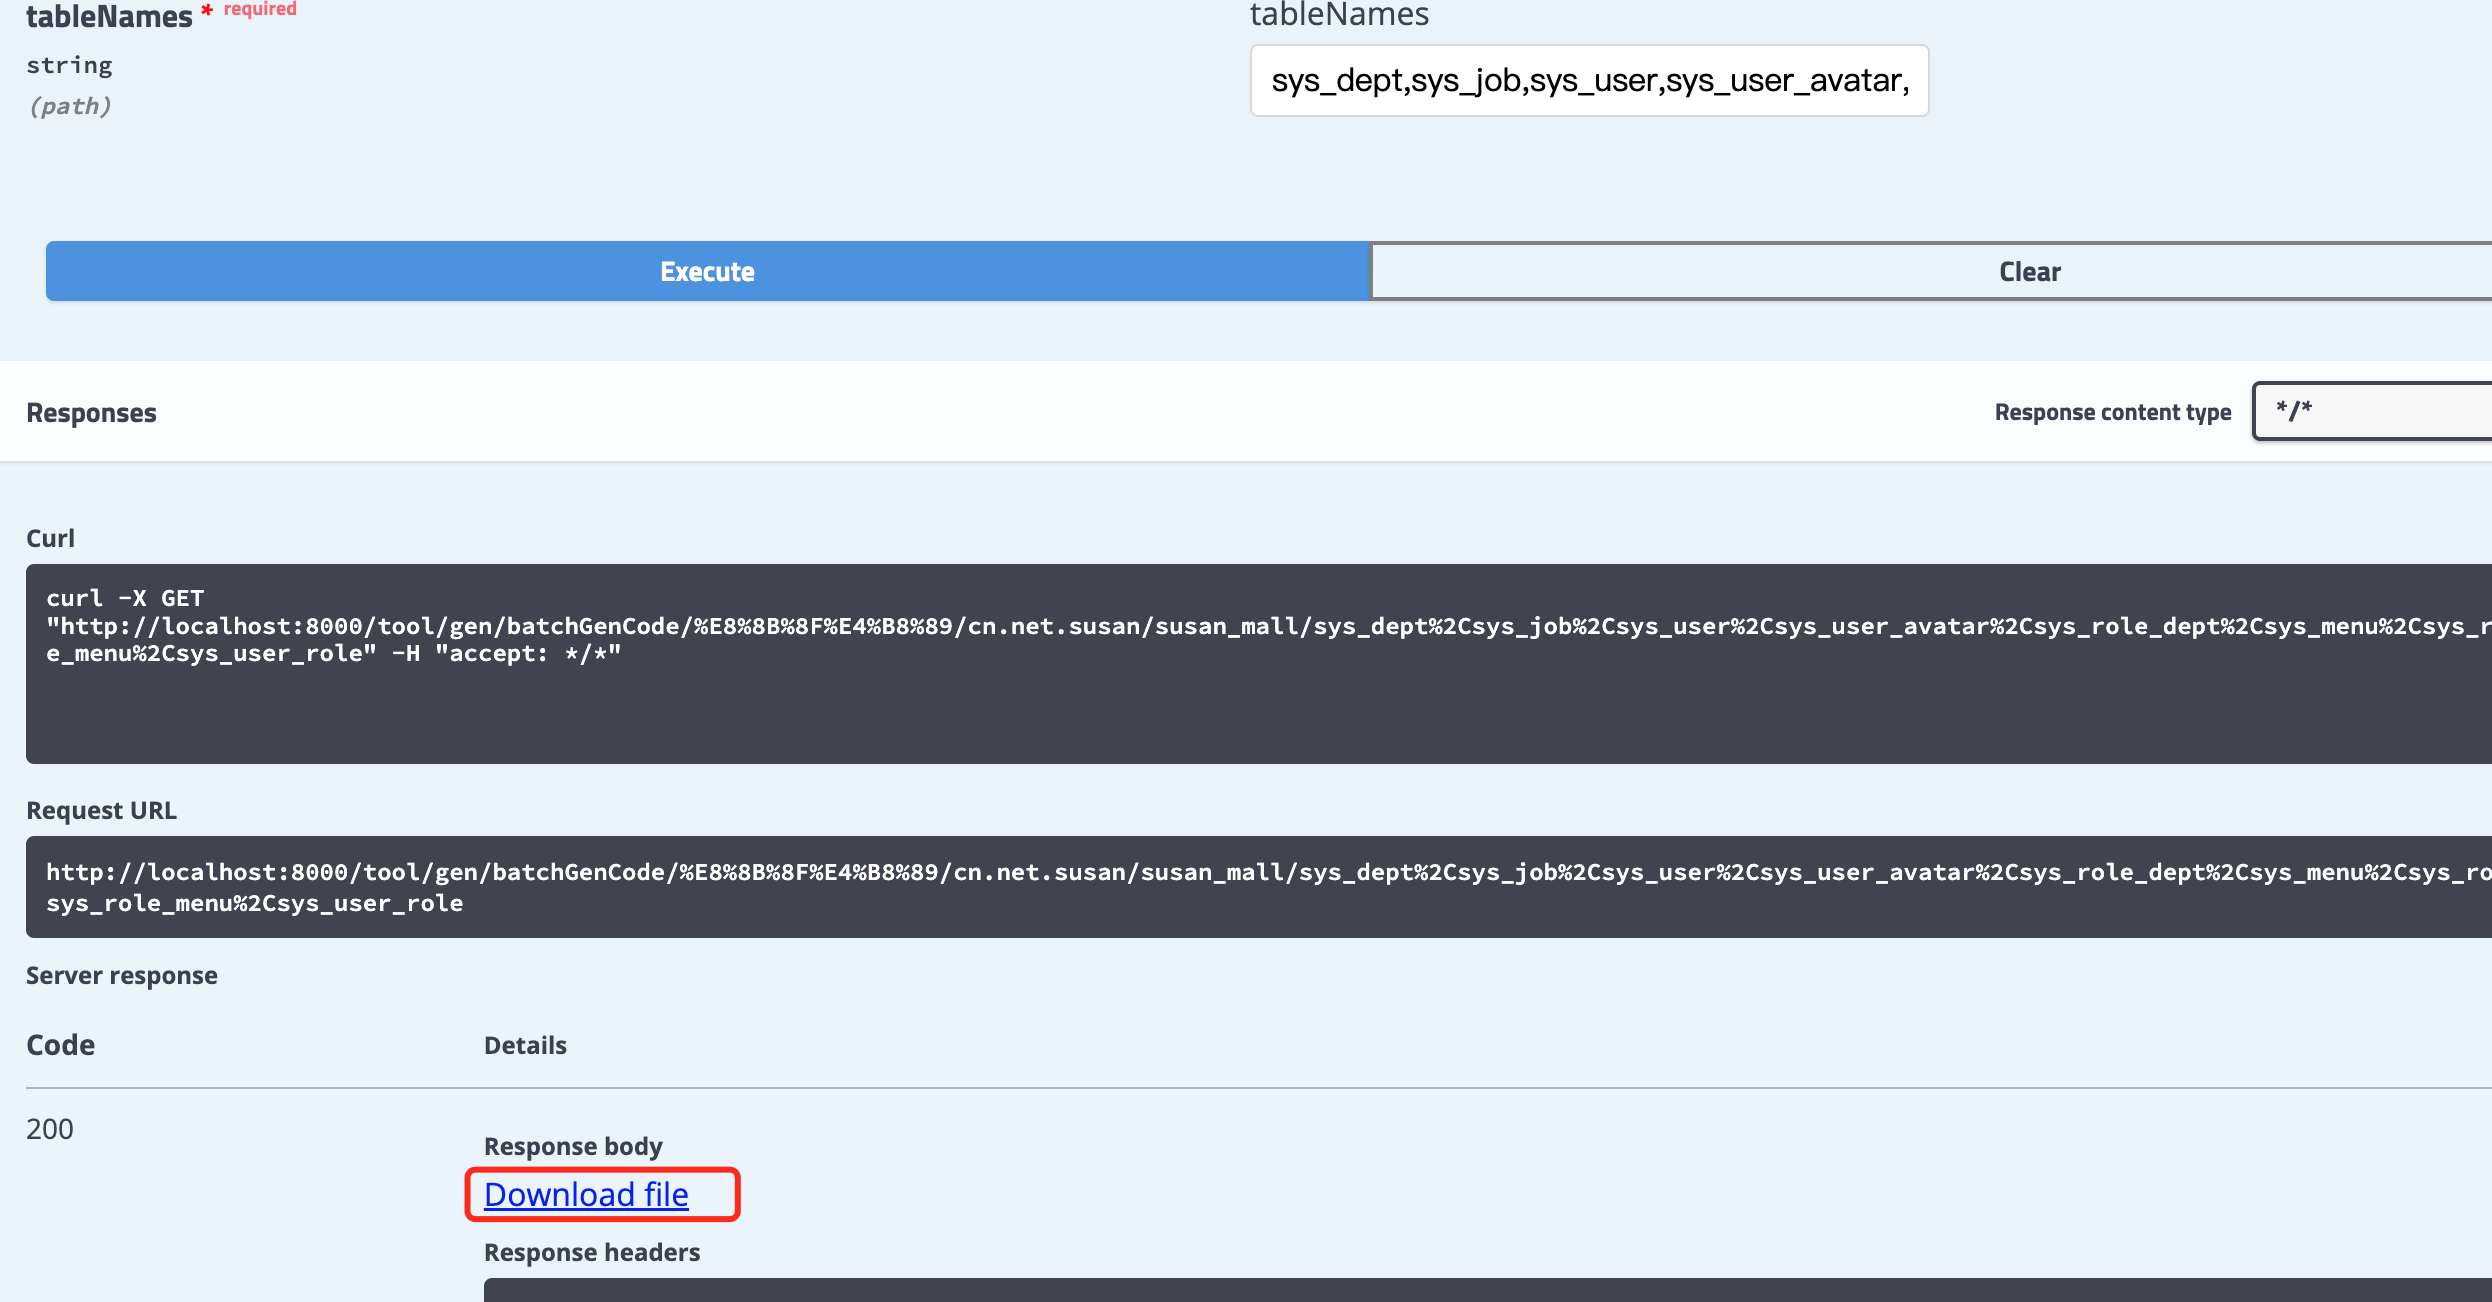
代码生成完成之后,在这里可以看到Download file按钮,点击之后可以在浏览器上下载生成的代码。
在磁盘上可以看到一个名叫suexxx.zip的文件,和一个mainxxx的目录,这个目录是suexxx.zip的文件自动解压出来的。
打开这个目录会惊喜的发现,我们需要的Controler、Service、Mapper、Entity和xml代码都已经生成好了: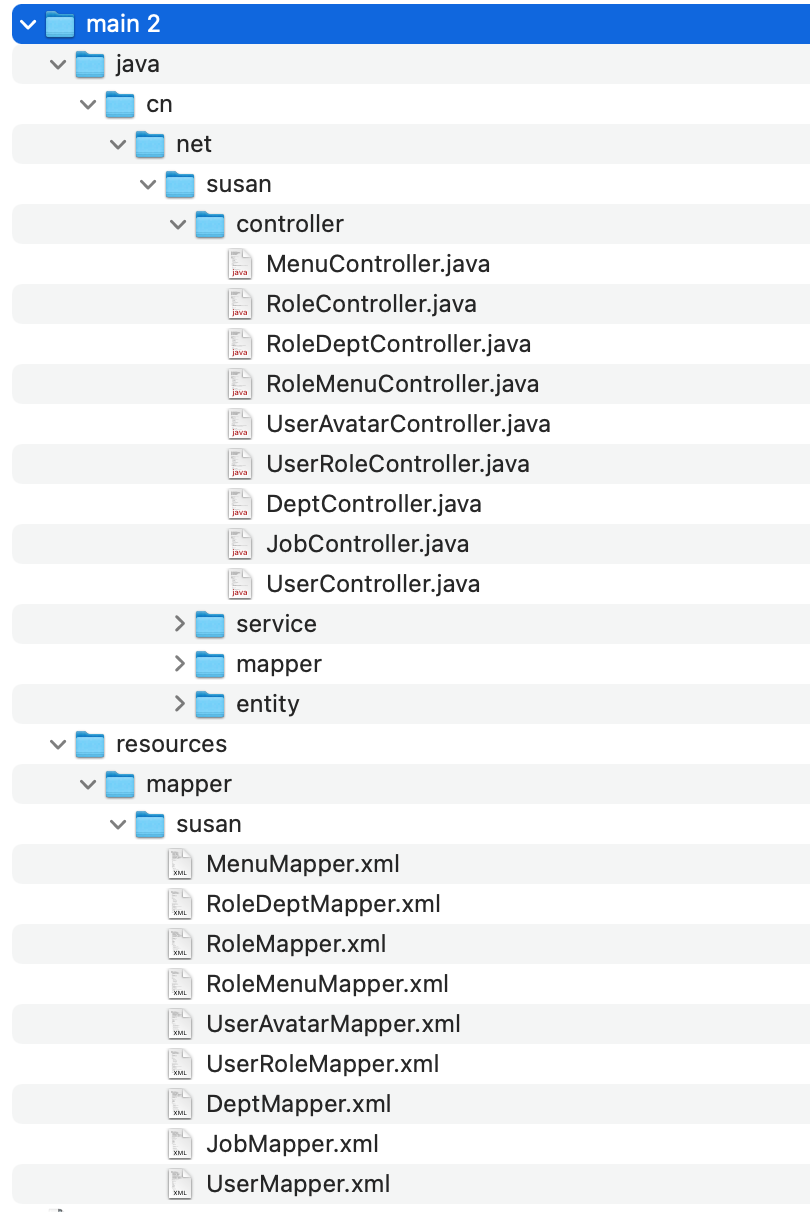
3 将生成的代码复制到项目中
然后将这些生成出来的代码复制到susan-mall项目中:
将Service、Mapper、Entity和xml代码复制到susan-business模块下。
注意要复制到第一层目录下,比如:entity目录,而不是entity的子目录user目录下。
将Controller代码复制到susan-mgt模块下。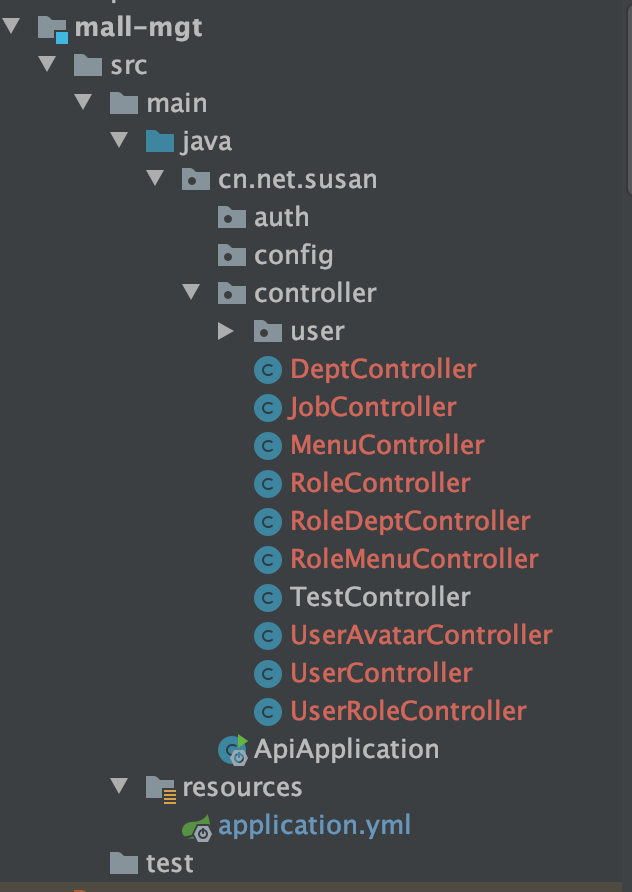
4 规划模块目录
目前已经将权限模块的代码生成好,并且复制到项目中了。
我们首先要开发的功能模块是:权限模板,属于系统模块,因此增加了一个sys目录,将生成的代码都放到这个目录下,方便后面好管理代码。
把相关代码如下到这个目录下: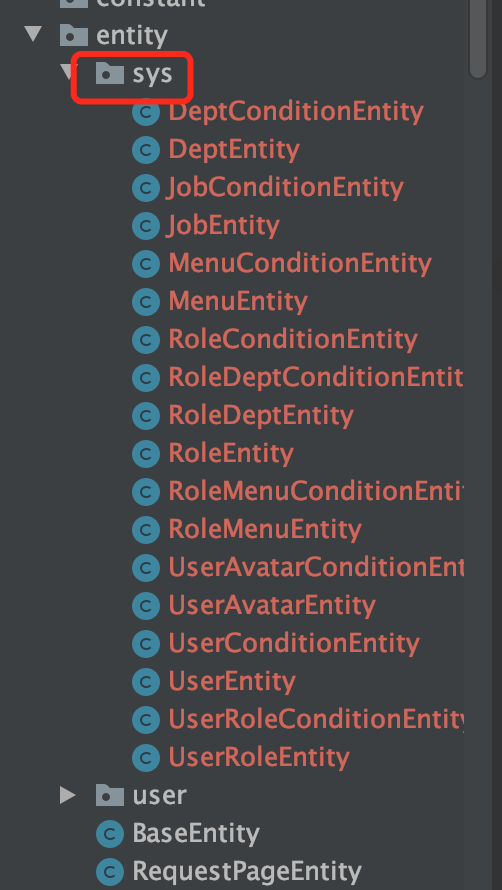
由于之前项目中已经存在一个名叫UserController的模块接口代码,Spring不允许出现重名的接口。
因此,我决定将之前的模版代码中的User改成UserDemo。
5 引入swagger功能
调整了代码目录之后,接下来,需要将该项目运行起来,测试功能是否正常。
为了方便查看接口情况,这里需要引入swagger的功能。
要在mall-mgt模块的pom.xml中引入下面的依赖包:
<dependency>
    <groupId>com.github.xiaoymin</groupId>
    <artifactId>knife4j-spring-boot-starter</artifactId>
    <version>3.0.2</version>
</dependency>
同时在mall-business模块的pom.xml中引入下面的依赖包:
<dependency>
    <groupId>org.springframework.boot</groupId>
    <artifactId>spring-boot-starter-actuator</artifactId>
</dependency>
然后mall-mgt的application.yml配置文件中增加:
spring:
  mvc:
    pathmatch:
      matching-strategy: ant_path_matcher
否则项目启动时会报空指针问题。
SpringBoot2.7x跟Swagger3.x有冲突。
然后增加swagger的配置类:
/**
 * @author 苏三,该项目是知识星球:java突击队 的内部项目
 * @date 2024/1/8 下午4:45
 */
@Configuration
@EnableSwagger2
public class SwaggerConfig {
    @Bean
    public Docket createRestApi() {
        return new Docket(DocumentationType.OAS_30)
                .apiInfo(apiInfo())
                .groupName("SwaggerGroup")
                .select()
                .apis(RequestHandlerSelectors.basePackage("cn.net.susan.controller"))
                .paths(PathSelectors.any())
                .build();
    }

    /**
     * 配置基本信息
     *
     * @return
     */
    @Bean
    public ApiInfo apiInfo() {
        return new ApiInfoBuilder()
                //设置文档标题(API名称)
                .title("苏三商城")
                //文档描述
                .description("API-接口说明")
                //版本号
                .version("1.0.0")
                .build();
    }

    /**
     * 增加如下配置可解决Spring Boot  与Swagger 3.0.0 不兼容问题
     **/
    @Bean
    public WebMvcEndpointHandlerMapping webEndpointServletHandlerMapping(WebEndpointsSupplier webEndpointsSupplier, ServletEndpointsSupplier servletEndpointsSupplier, ControllerEndpointsSupplier controllerEndpointsSupplier, EndpointMediaTypes endpointMediaTypes, CorsEndpointProperties corsProperties, WebEndpointProperties webEndpointProperties, Environment environment) {
        List<ExposableEndpoint<?>> allEndpoints = new ArrayList();
        Collection<ExposableWebEndpoint> webEndpoints = webEndpointsSupplier.getEndpoints();
        allEndpoints.addAll(webEndpoints);
        allEndpoints.addAll(servletEndpointsSupplier.getEndpoints());
        allEndpoints.addAll(controllerEndpointsSupplier.getEndpoints());
        String basePath = webEndpointProperties.getBasePath();
        EndpointMapping endpointMapping = new EndpointMapping(basePath);
        boolean shouldRegisterLinksMapping = this.shouldRegisterLinksMapping(webEndpointProperties, environment, basePath);
        return new WebMvcEndpointHandlerMapping(endpointMapping, webEndpoints, endpointMediaTypes, corsProperties.toCorsConfiguration(), new EndpointLinksResolver(allEndpoints, basePath), shouldRegisterLinksMapping, null);
    }

    private boolean shouldRegisterLinksMapping(WebEndpointProperties webEndpointProperties, Environment environment, String basePath) {
        return webEndpointProperties.getDiscovery().isEnabled() && (StringUtils.hasText(basePath) || ManagementPortType.get(environment).equals(ManagementPortType.DIFFERENT));
    }
}
配置好之后,重新启动项目成功了。
在浏览器上输入地址:http://localhost:8011/swagger-ui/index.html
可以看到相关的接口了: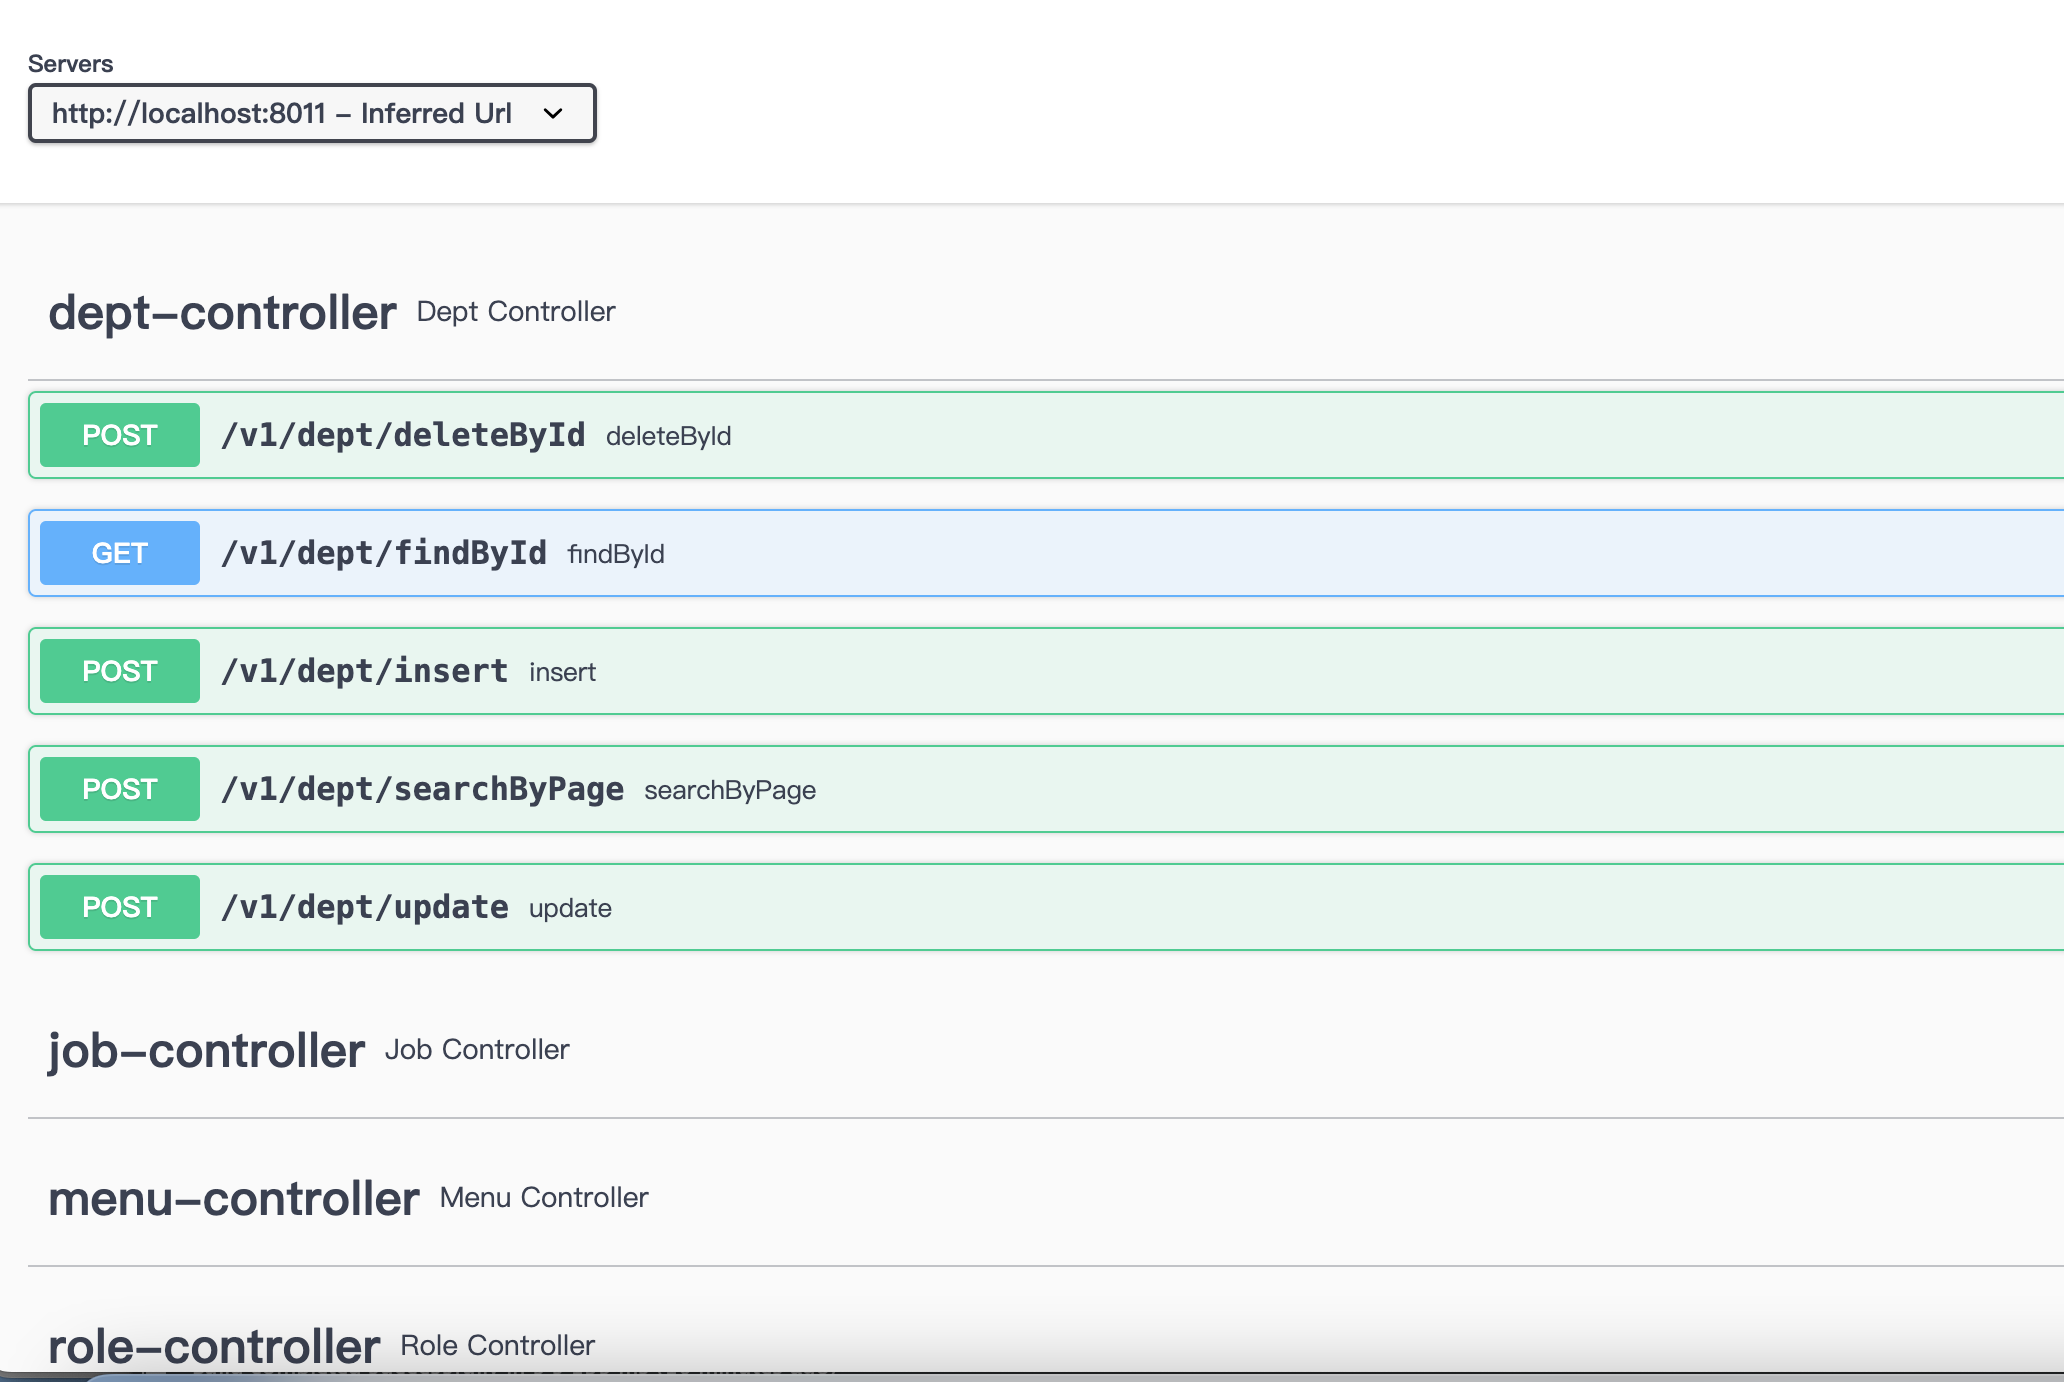
说明我们的接口生成成功了。
但之前的代码生成工具,生成的代码不包含Swagger注解的代码。
这部分功能完全,可以自动生成。
改造代码生成工具,重新生成entity和controller的代码,复制到项目中,运行项目,重新访问swagger地址,发现接口描述信息已经修改了: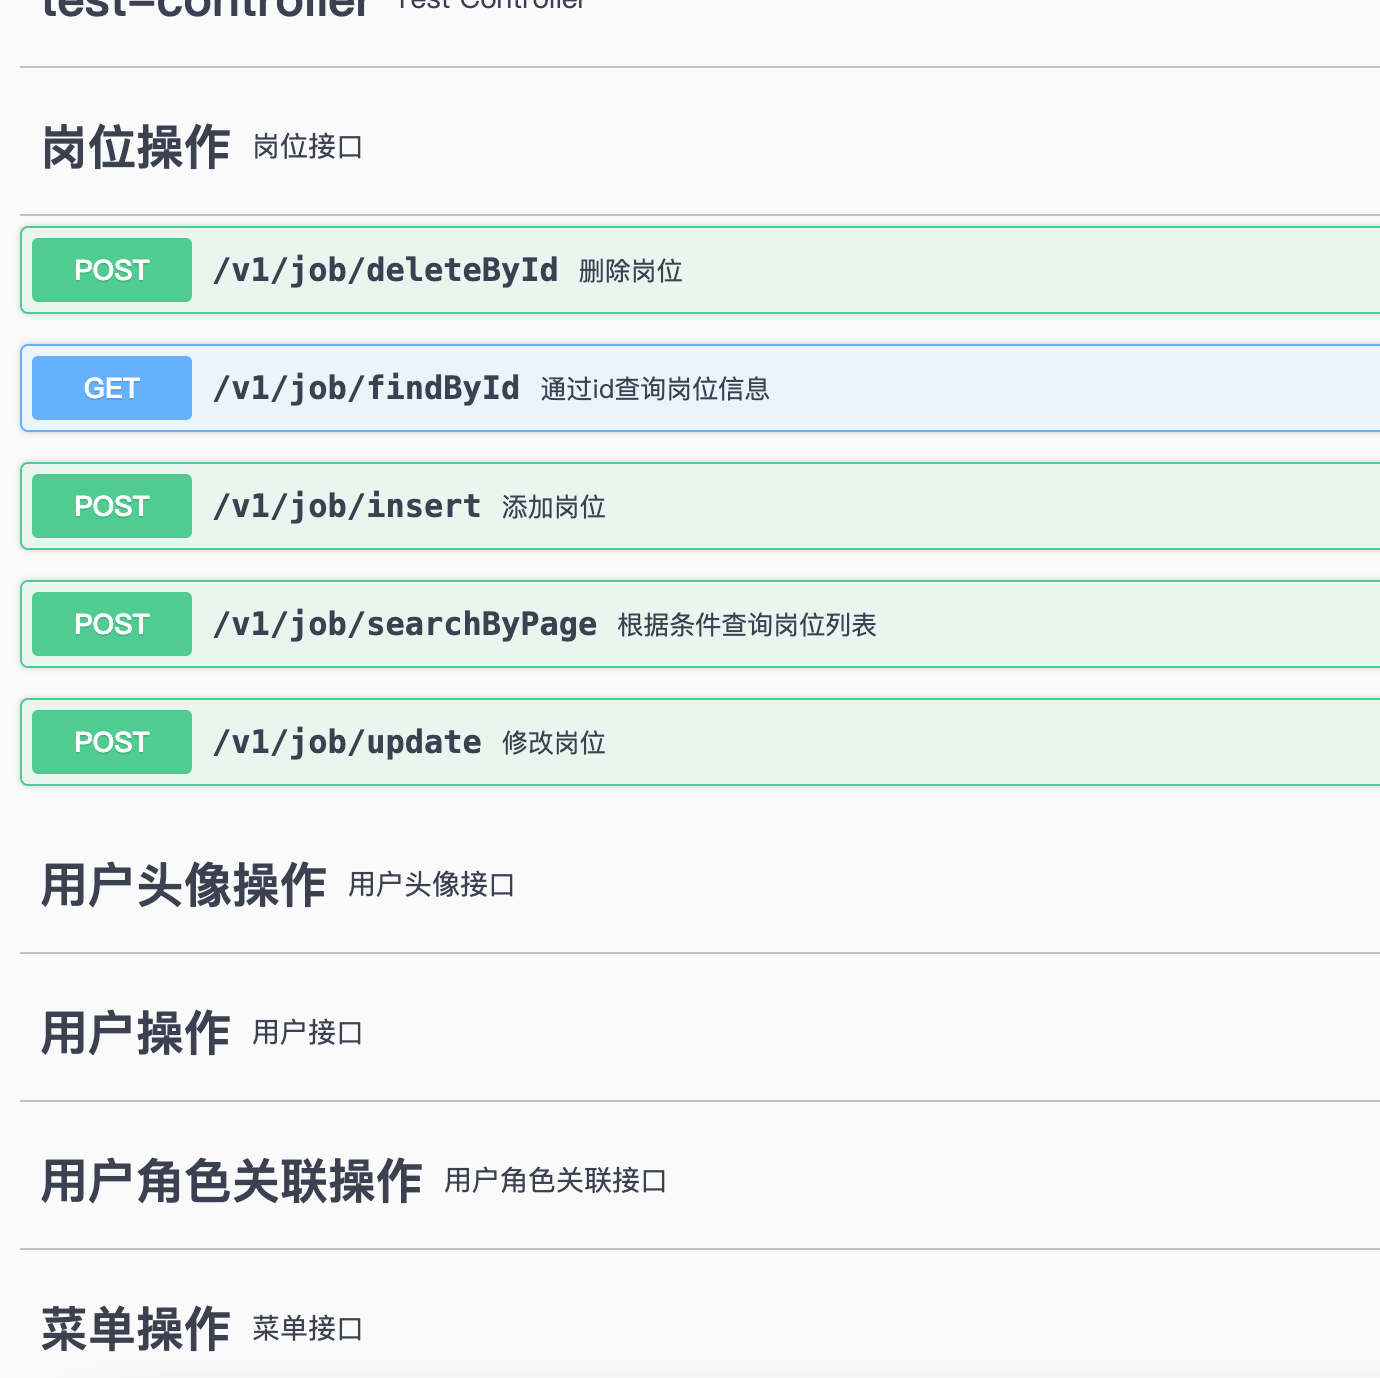
此外,项目启动的会报一个Redis无法连接的问题,暂时可以忽略,是Spring的监控功能报的对目前的接口功能没有影响,后面才会使用Redis。